Self-hosted Quick Start
Bika not only offers powerful features but also supports self-hosted deployment, providing users with greater flexibility and data security. Self-hosted deployment involves installing the software on your own servers rather than relying on cloud service providers.
Why self-hosted deployment?
Self-hosted deployment means installing the software on the user's own server instead of relying on a cloud service provider. This approach brings many benefits to users:
- Data Sovereignty: Users have complete control over their data, which is stored on local servers, ensuring that it cannot be accessed or misused by third parties.
- Security: Self-hosted deployment allows users to configure according to their own security policies, such as firewall settings and access controls, thus better protecting data security.
- Compliance: For industries with strict data privacy requirements (such as healthcare and finance), self-hosted deployment can meet compliance needs, avoiding risks associated with storing data on third-party platforms.
- Customization: Users can deeply customize the system based on their business needs without being constrained by cloud service provider limitations.
Steps for self-hosted Deployment
If you wish to use self-hosted deployment, follow these steps:
- Operate in Personal Settings:
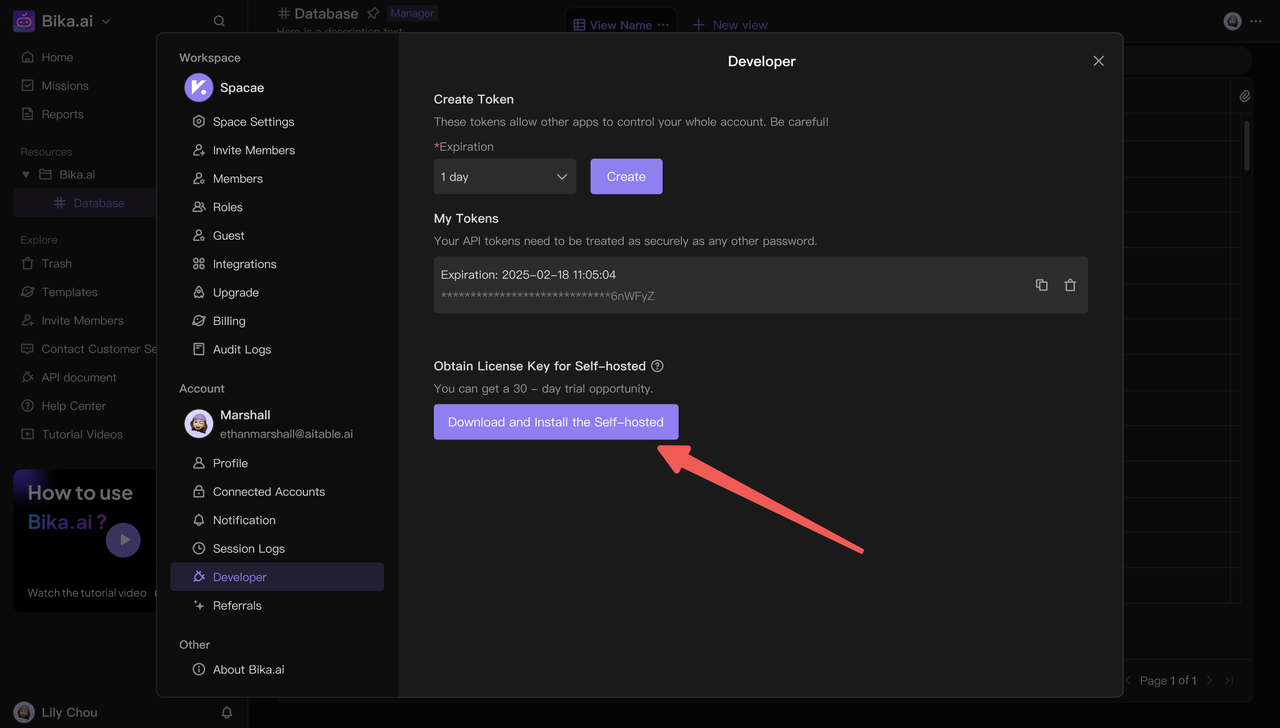
• Navigate to your "Personal Settings" page. Under the "Developer" tab, you will find a button labeled “Download Self-hosted Deployment Version.” Click this button to be redirected to the application page.
- Apply for Installation Guide and Package:
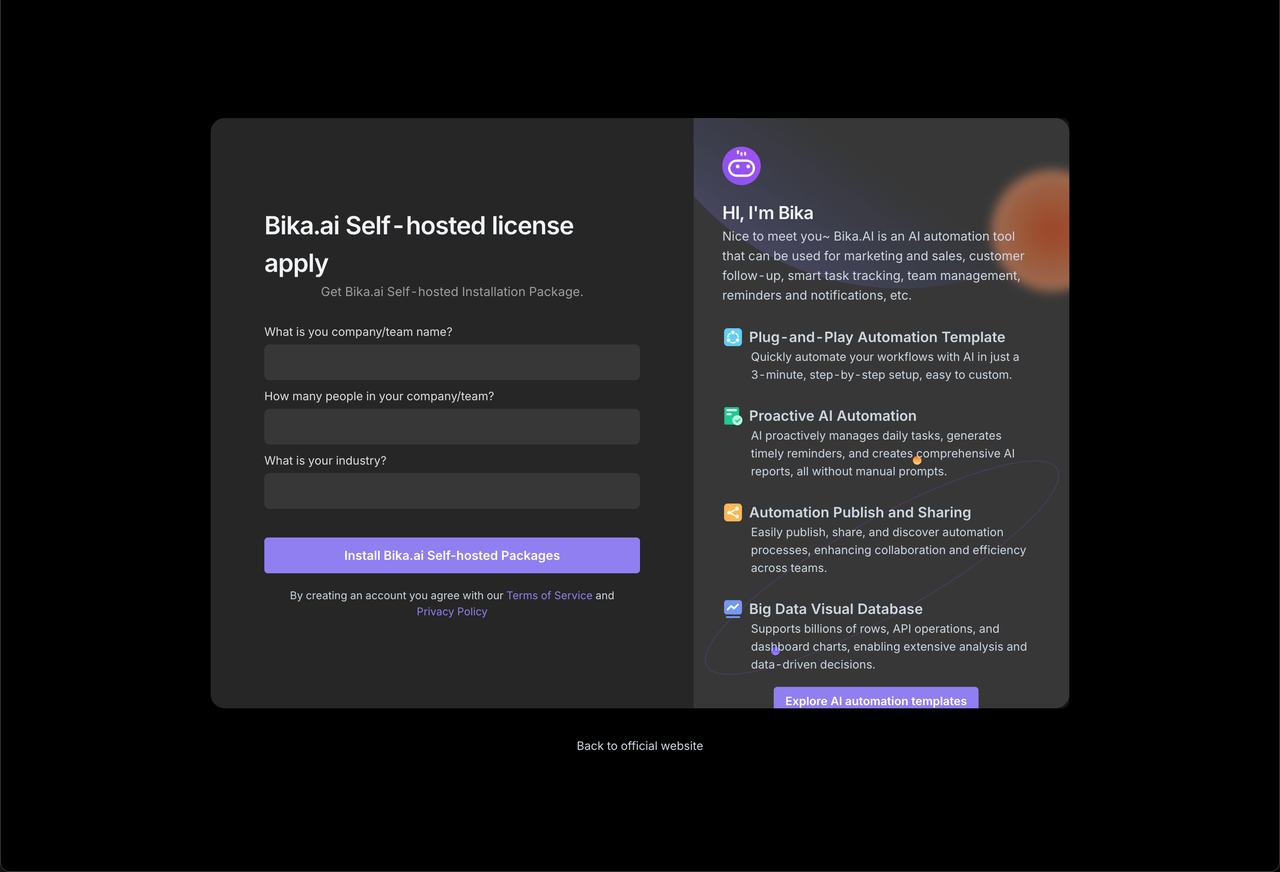
• On the application page https://bika.ai/license , fill out the form to apply. After submission, you will receive a quick start development guide, private deployment guide, and the installation package along with installation instructions.
- Complete Installation of the Self-hosted Deployment Version:
• Follow the installation guide to install the self-hosted deployment version. Upon first opening Bika.ai, the system will prompt you to enter a license key.
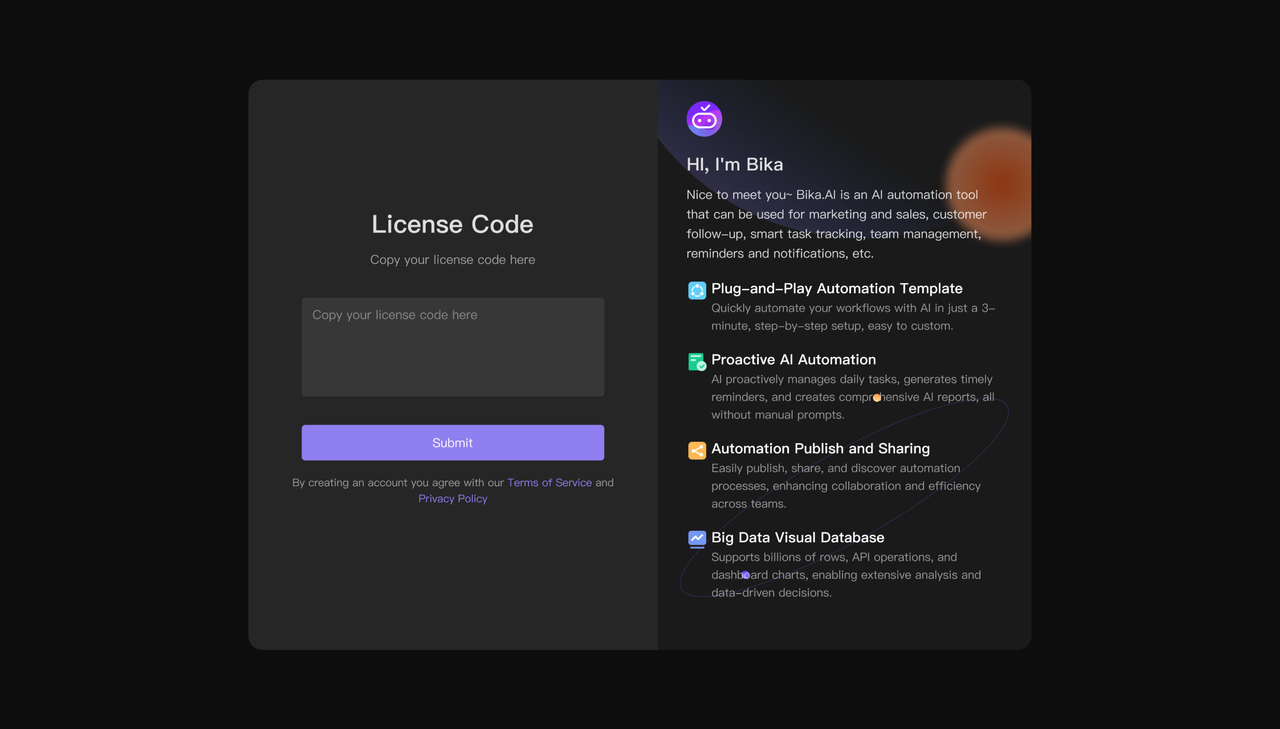
- Obtain and Enter License Key:
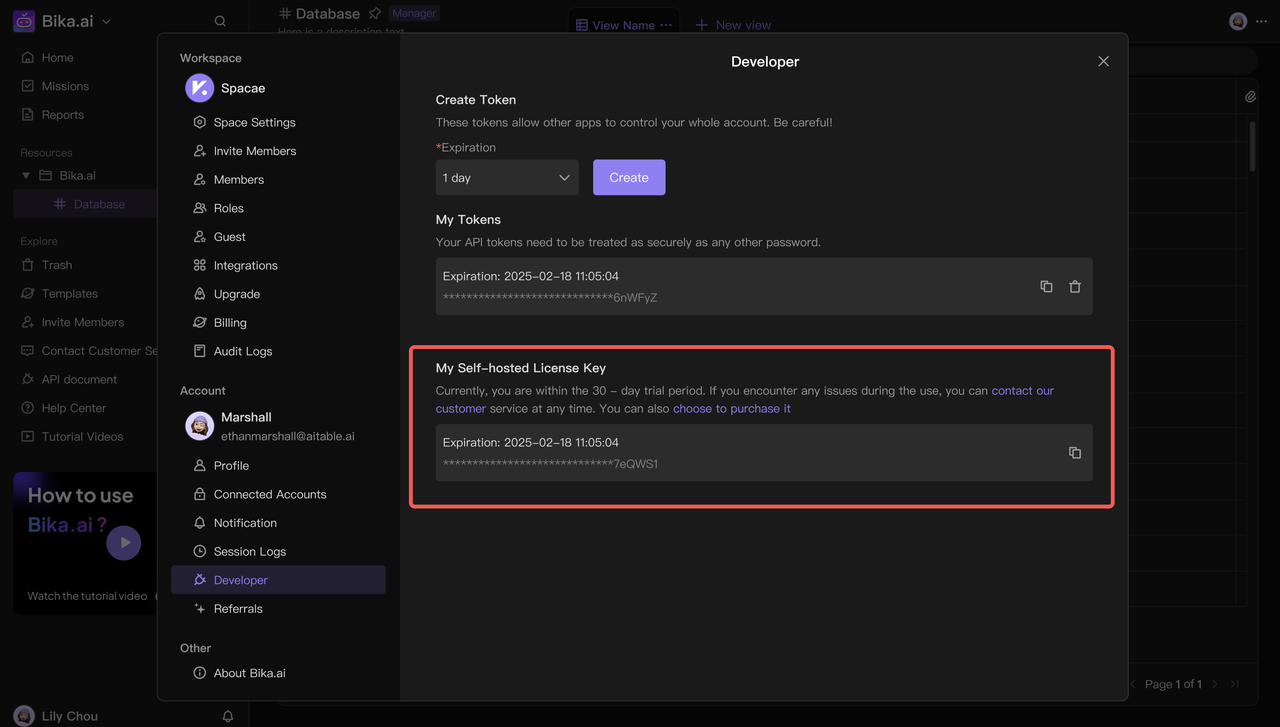
•Return to the "Personal Developer Interface." Below this interface, you will see a "License Key" button. After completing the installation, click this button and follow the prompts to input the corresponding key to proceed with subsequent operations.
- Start Your 30-Day Trial: You will receive a 30-day trial period for the license key. Input this key where prompted to activate the trial deployment.
- Purchase for Continued Use: After the trial period, if you wish to continue using the software, return to the page to purchase a full license, converting your trial deployment into an officially authorized version. Post-purchase, you will typically receive a new license key.
- Customer Support: If you encounter any issues during the process, you can click on the "Contact Customer Service" link next to the purple text for assistance.
Begin Your Self-hosted Deployment Journey with Bika
Bika’s self-hosted deployment offers a flexible, secure, and customizable solution for managing your data.
Now, please open the https://bika.ai/pricing page, click Self-hosted Installation, and start deploying your Bika instance.
Begin your personalized data management journey today!

Recommend Reading
- Unleash Email Mastery: The Best Email Client for Mac Meets Content Marketing for SEO Automation
- Beyond Basic Tracking: How Automation Transforms Habit Building for Sales and Finance Teams
- Unleash Email Efficiency: The Best Email Client for Mac Meets Contractor/Freelancer Management Automation
- Overwhelmed Sales Teams? How AI Calendar and Sales Strategy Tame Scheduling Chaos
- Unleash Email Mastery: The Best Email Client for Mac Meets Content Marketing for SEO Automation
Recommend AI Automation Templates


Coming soon


Coming soon